Select Printable Area Excel
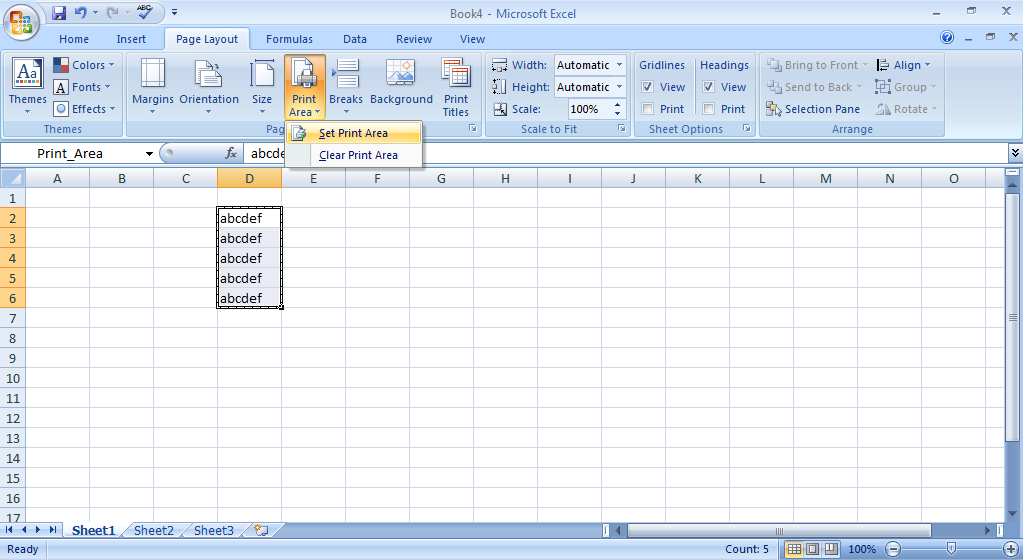
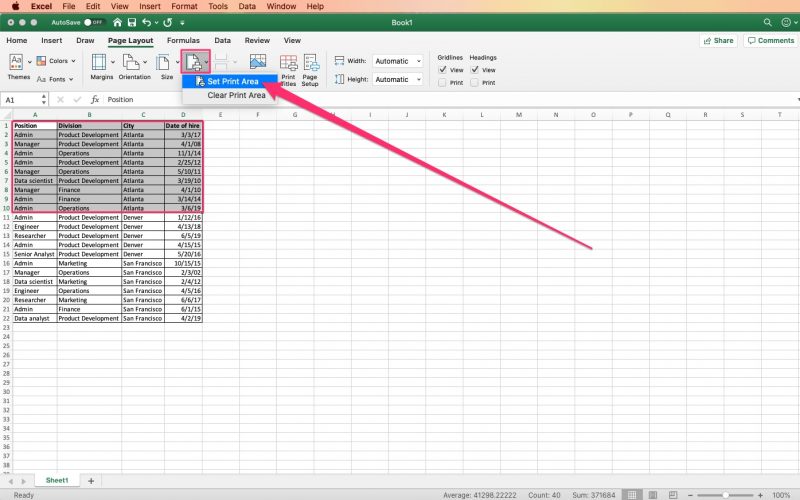
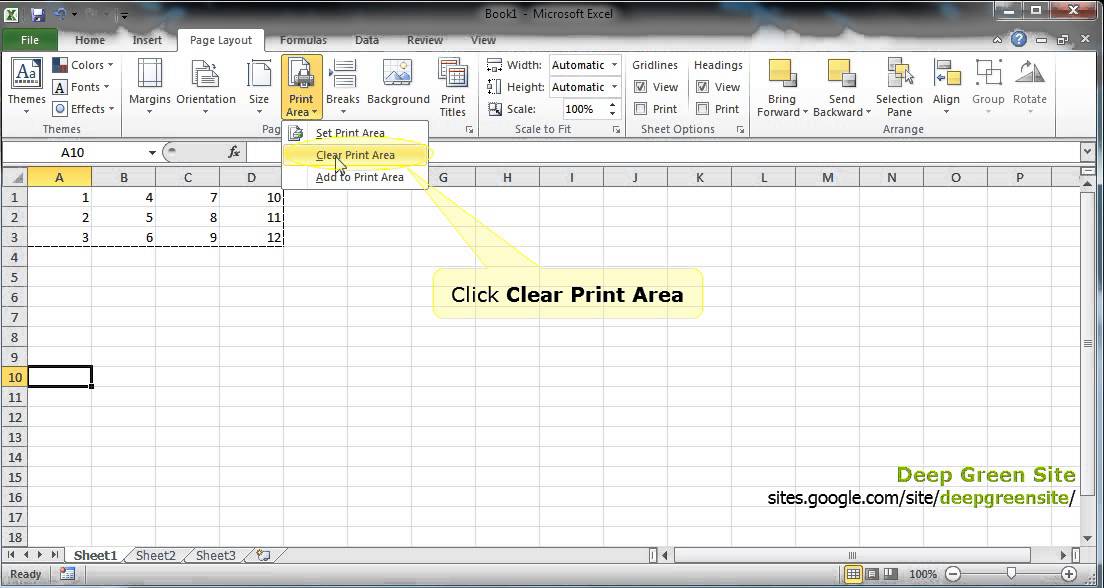
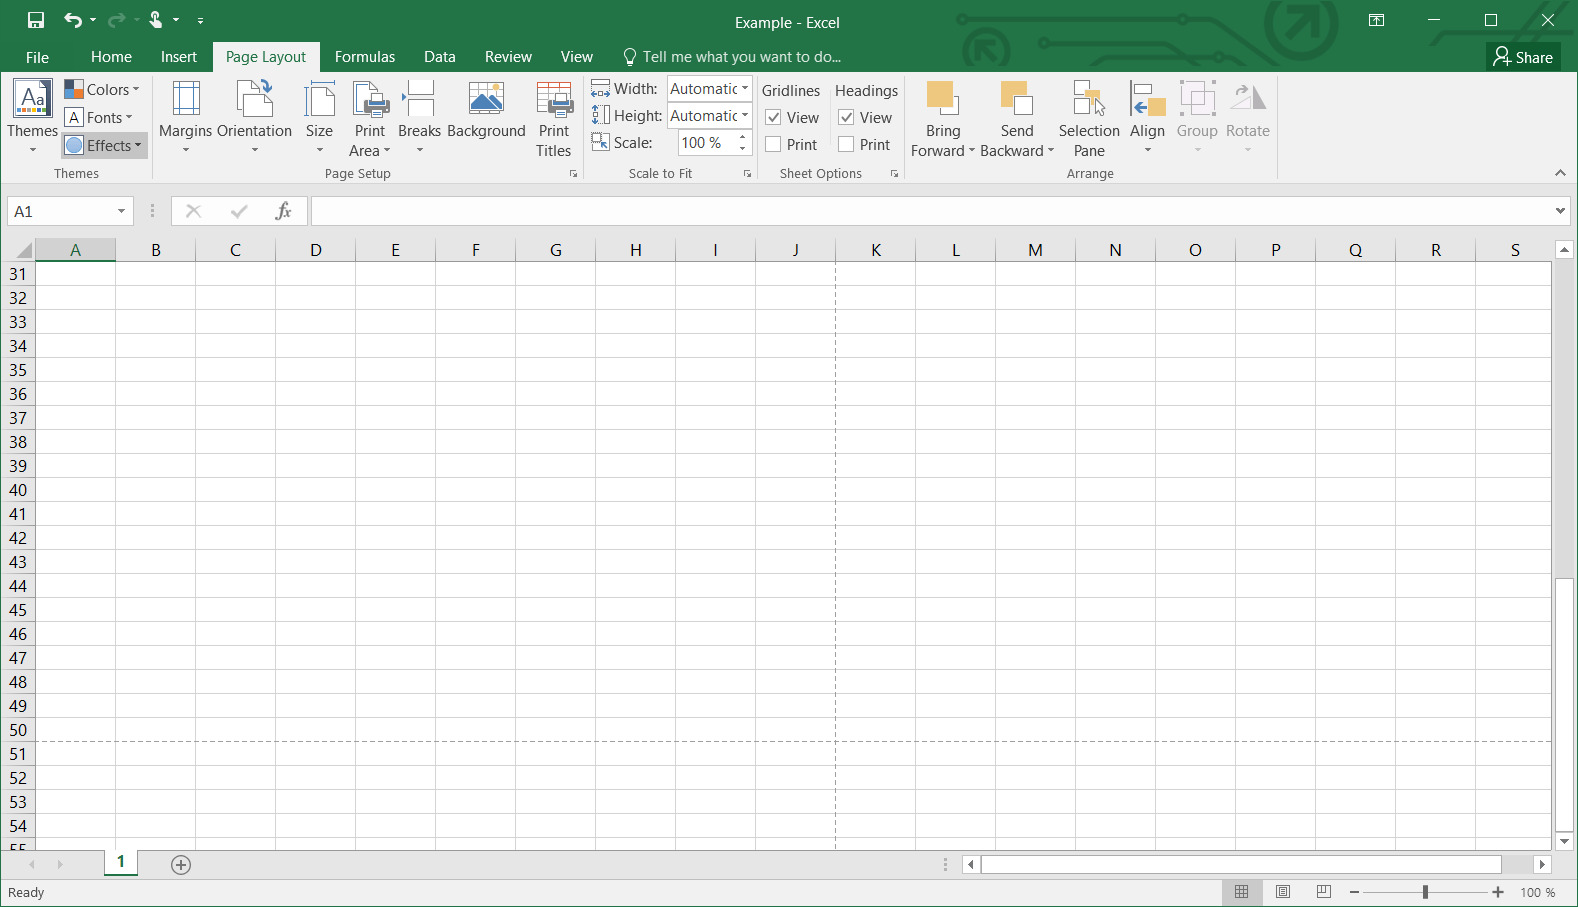
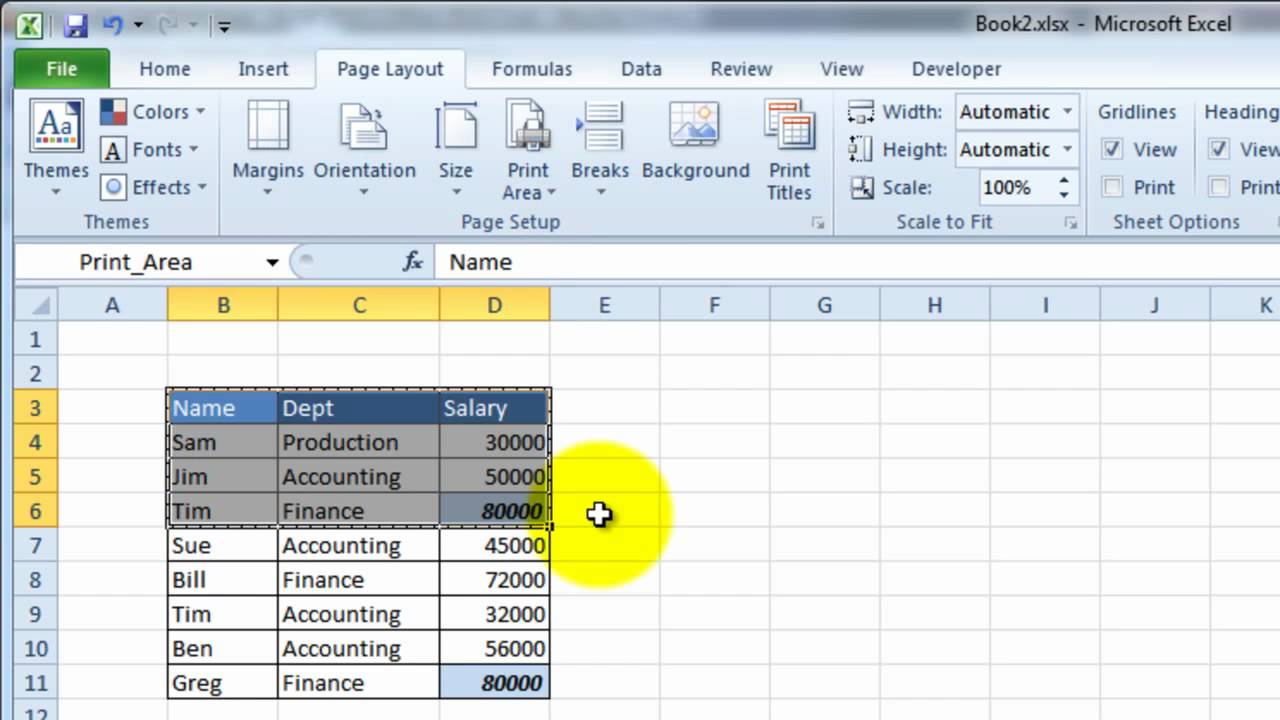
Select Printable Area Excel - Here we have selected b4:f12. Click the print area button in the page. First, go to the “page layout” tab. Web the print area feature in excel is a powerful tool that makes it easier to print just the data you need by allowing you to select part of. Web how to set print area in excel how to set print area and page breaks in excel there are two ways to specify the workbook data. Web the fastest and easiest way to define the print area in excel is to select the area using your mouse. Select the range of cells you want to print. Select the cells that you want to print. Select a range of cells. After that, go to print layout > print area and select set print area. Web print all or part of a worksheet. Here we have selected b4:f12. Web choose set print area. to set multiple print areas in your sheet, hold ctrl as you select each group of cells. This saves you from printing unnecessary. Web the fastest and easiest way to define the print area in excel is to select the area using. Or, click the file tab from. Web print all or part of a worksheet. Web setting the print area in microsoft excel if you print the selected area frequently, you can set the selected range. Then, click on a “print area”. Select the range of cells you want to print. Select the range of cells you want to print. Web to set a print area, execute the following steps. Web if you want to change the print area in excel, just select a new cell range in your excel sheet. Go to the page layout tab. Web on the page layout tab, in the page setup group, click print area. Here we have selected b4:f12. Then, click on the print. Or, click the file tab from. Web choose set print area. to set multiple print areas in your sheet, hold ctrl as you select each group of cells. Excel saves the print area together with the workbook. Select the area that you need to print. Go to the page layout tab. Web on the page layout tab, in the page setup group, click print area > set print area. Web below are the steps to set and change the print area in excel: On the page layout tab, in the page setup group, click on the print. Web the fastest and easiest way to define the print area in excel is to select the area using your mouse. On the page layout tab, in the page setup group, click on the print area dropdown. First, go to the “page layout” tab. Web the print area feature in excel is a powerful tool that makes it easier to. Set a new print area you can add a new print area in your worksheet from the page layout tab in the menubar. Web open a worksheet and select the cells that you want to be part of the print area. Click the worksheet, and then select the range of data that you want to print. Go to the page. Click the worksheet, and then select the range of data that you want to print. Select the cells that you want to print. Then, click on the print. Web open a worksheet and select the cells that you want to be part of the print area. Set a new print area you can add a new print area in your. Select a range of cells. Go to the page layout tab. Web the fastest and easiest way to define the print area in excel is to select the area using your mouse. On the page layout tab, in the page setup group, click on the print area dropdown. After that, go to print layout > print area and select set. Web open a worksheet and select the cells that you want to be part of the print area. Web choose set print area. to set multiple print areas in your sheet, hold ctrl as you select each group of cells. Go to the page layout tab. On the page layout tab, in the page setup group, click print area. Excel. Web print all or part of a worksheet. Select the area that you need to print. Click the print area button in the page. Web in this post, we’ll walk you through the steps to set the printable area in excel, whether you’re using the desktop. Web choose set print area. to set multiple print areas in your sheet, hold ctrl as you select each group of cells. Then, click on a “print area”. Web setting the print area in microsoft excel if you print the selected area frequently, you can set the selected range. Web set a print area. Excel saves the print area together with the workbook. Refer to the below screenshot. On the page layout tab, in the page setup group, click print area. Then, click on the print. Or, click the file tab from. Web start by opening the excel spreadsheet you need, hold down the ctrl key and highlight the area of the document you want to. Select a range of cells. Web on the page layout tab, in the page setup group, click print area > set print area. Web below are the steps to set and change the print area in excel: Web using the page layout tab can be another method to show selected print areas in excel. Select the cells that you want to print. Web the print area feature in excel is a powerful tool that makes it easier to print just the data you need by allowing you to select part of. Then, click on a “print area”. Web to set a print area, execute the following steps. After that, go to print layout > print area and select set print area. Web choose set print area. to set multiple print areas in your sheet, hold ctrl as you select each group of cells. Then go to page layout. Select the cells that you want to print. Select the print active sheets. Click the print area button in the page. On the page layout tab, in the page setup group, click print area. Web using the page layout tab can be another method to show selected print areas in excel. Web setting the print area in microsoft excel if you print the selected area frequently, you can set the selected range. Web on the page layout tab, in the page setup group, click print area > set print area. Web in this post, we’ll walk you through the steps to set the printable area in excel, whether you’re using the desktop. Refer to the below screenshot. On the page layout tab, in the page setup group, click on the print area dropdown. Select the range of cells you want to print.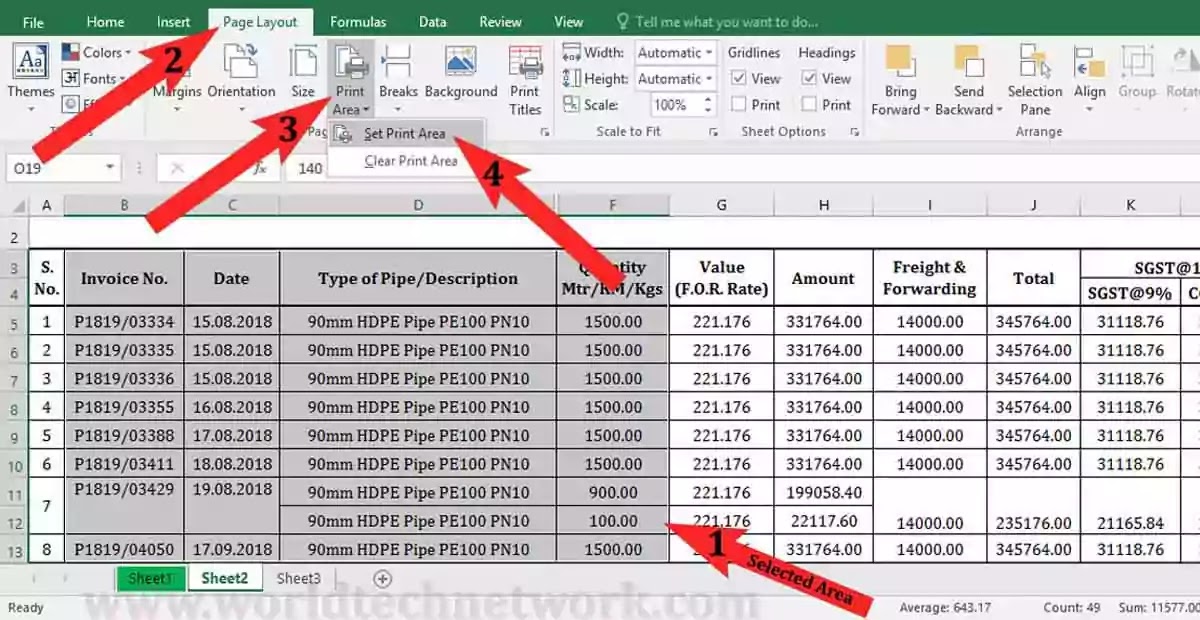
How to Select Print Area in MS Excel एक्सेल में प्रिंट एरिया सिलेक्ट
:max_bytes(150000):strip_icc()/ExcelPageBreakPreview-5c1c28c8c9e77c00017a2ade.jpg)
How to Set Print Area in Excel
Ravi's Online Diary How to Set Print Area in excel?
:max_bytes(150000):strip_icc()/ExcelSetPrintArea-5c23d199c9e77c0001adc722.jpg)
How to Set Print Area in Excel
How to set a print area in Microsoft Excel to print a specific section
Stereotype To interact Recover how to set print area in excel 2010
How to set the print area in Excel IONOS
VideoExcel How to manually set the print area in Excel 2010 Mẹo
:max_bytes(150000):strip_icc()/ExcelClearPrintArea-5c1c287ac9e77c000159666f.jpg)
How to Set Print Area in Excel

How to Clear a Print Area in Excel for Office 365 Support Your Tech
Web Select The Range Of Cells You Want To Print Or Set As The Print Area In That Worksheet.
Set A New Print Area You Can Add A New Print Area In Your Worksheet From The Page Layout Tab In The Menubar.
Then, Click On The Print.
Web Open A Worksheet And Select The Cells That You Want To Be Part Of The Print Area.
Related Post: